はじめに
横浜で家を買う直前の時期あたり(2014年くらい)から、個人用の情報の蓄積用にMediaWikiをインストールして運用していましたが…
- MediaWikiの拡張機能の維持管理が独自仕様であり、個人が片手間で行うには大掛かりすぎる感じであること。FedoraのアップグレードとともにMediaWiki本体のバージョンも上がりますが、それにつれてMediaWikiの関数や内部の仕様が大きく変わることがあります。その変更に拡張機能がついて行けなくなることが割とあり、その対応のための作業に相当の手間を要することも多々あります。
- MediaWikiにある記事のうち定期的に追加したり更新している記事の内容がMediaWikiが本来得意としている用語に対する説明というよりはメモ書き的なものが多く、かつ特定の内容に絞られてきたこと。
- 過去にMediaWikiに保存した記事をさかのぼってみても、保存が必要な記事はメモ書き的な記事がほとんどであること。
- たまたま職場でcrowiを使い始めたので、使ってみたところ使いやすかったこと(※個人の感想です)。
ということになってきました。
そこで、Fedora 31で稼働させているサーバにcrowi…ではなく、GROWIをインストールすることにしました。
前提となるソフトウェアのインストール
インストールの対象から除外したソフトウェア
GROWI本体のインストールの前に、GROWIが依存しているソフトウェア(以下、「前提となるソフトウェア」と書きます。)をインストールしますが、インストール先のマシンのリソースの制約の関係で、Elasticsearchはインストールを行っていません。
Node.js及びのインストール
まず、最初にNode.js及びnpmをインストールしますが…
メタデータの期限切れの最終確認: 2:13:07 時間前の 2020年01月06日 17時53分18秒 に実施しました。
依存関係が解決しました。
(中略)
インストール 5 パッケージ
ダウンロードサイズの合計: 25 M
インストール済みのサイズ: 132 M
これでよろしいですか? [y/N]: y
(中略)
インストール済み:
nodejs-1:12.13.1-1.fc31.x86_64 nodejs-docs-1:12.13.1-1.fc31.noarch libuv-1:1.34.0-1.fc31.x86_64 nodejs-libs-1:12.13.1-1.fc31.x86_64
npm-1:6.12.1-1.12.13.1.1.fc31.x86_64
完了しました!
ということで、Node.jsは12.13.1がインストールされたようです。
この記事を最初に書いた時点(2020年1月)におけるGROWIのGitHubのページによると、Node.jsはv10.xにのみ対応していてv11.xについては”DON’T USE”になっていますが、
「今回インストールしたNode.jsはv11.xではないのでヨシ!!(画像略)」
ということにして、先に進むことにします。
なお、npmは6.12.1がインストールされているようです。
GNU C++のインストール
次はyarnのインストールをしますが、その前にyarnがGNU C++を利用しているため、GNU C++パッケージをインストールします。
メタデータの期限切れの最終確認: 2:14:42 時間前の 2020年01月06日 17時53分18秒 に実施しました。
依存関係が解決しました。
(中略)
インストール 2 パッケージ
ダウンロードサイズの合計: 13 M
インストール済みのサイズ: 41 M
これでよろしいですか? [y/N]: y
(中略)
インストール済み:
gcc-c++-9.2.1-1.fc31.x86_64 libstdc++-devel-9.2.1-1.fc31.x86_64
完了しました!
yarnのインストール
yarnを以下の手順でインストールします。
- 以下のコマンドを実行し、yarn用のリポジトリの定義ファイルを作成します。
$ curl -sL https://dl.yarnpkg.com/rpm/yarn.repo | sudo tee /etc/yum.repos.d/yarn.repo
[yarn]
name=Yarn Repository
baseurl=https://dl.yarnpkg.com/rpm/
enabled=1
gpgcheck=1
gpgkey=https://dl.yarnpkg.com/rpm/pubkey.gpgスポンサーリンク
- 以下のコマンドを実行し、yarnをインストールします。
$ sudo yum install yarn
Yarn Repository 994 kB/s | 364 kB 00:00
依存関係が解決しました。
(中略)
ダウンロードサイズの合計: 1.2 M
インストール済みのサイズ: 5.1 M
これでよろしいですか? [y/N]: y
(中略)
GPG 鍵 0x6963F07F をインポート中:
Userid : “Yarn RPM Packaging
Fingerprint: 9A6F 73F3 4BEB 7473 4D8C 6914 9CBB B558 6963 F07F
From : https://dl.yarnpkg.com/rpm/pubkey.gpg
これでよろしいですか? [y/N]: y
(中略)
インストール済み:
yarn-1.21.1-1.noarch
完了しました!
MongoDBのインストール
以下の手順でMongoDBをインストールします。
- MongoDBのリポジトリ定義用のファイル(Fedora 31用)を作成し、/etc/yum.repos.d/mongodb-org.repoというファイル名で保存します。Fedora 31用の設定がないので、Amazon用の設定を使用します。なお、以下の設定ではMongoDB 4.2用のリポジトリを使う設定としていますが、MongoDBも日々進化していますので、バージョンはできるだけ最新のものを使用した方がよいかもしれません。その際は”4.2″の部分を読み替えて使用します。
- 以下のコマンドを実行し、MongoDBをインストールします。
$ sudo dnf install mongodb-org
メタデータの期限切れの最終確認: 0:00:25 時間前の 2020年01月06日 20時18分31秒 に実施しました。
依存関係が解決しました。
(中略)
インストール 5 パッケージ
ダウンロードサイズの合計: 103 M
インストール済みのサイズ: 260 M
これでよろしいですか? [y/N]: y
(中略)
GPG 鍵 0x058F8B6B をインポート中:
Userid : “MongoDB 4.2 Release Signing Key
Fingerprint: E162 F504 A20C DF15 827F 718D 4B7C 549A 058F 8B6B
From : https://www.mongodb.org/static/pgp/server-4.2.asc
これでよろしいですか? [y/N]: y
(中略)
インストール済み:
mongodb-org-4.2.2-1.amzn1.x86_64 mongodb-org-mongos-4.2.2-1.amzn1.x86_64 mongodb-org-server-4.2.2-1.amzn1.x86_64
mongodb-org-shell-4.2.2-1.amzn1.x86_64 mongodb-org-tools-4.2.2-1.amzn1.x86_64
完了しました! - ここでサーバを再起動します。すると、systemd-sysv-generatorがsystemd用のserviceファイル(mongod.service)を生成してくれます。
- NoSQLの世界へようこそ。
Redisのインストール
以下のコマンドを実行し、Redisをインストールします。
メタデータの期限切れの最終確認: 0:02:45 時間前の 2020年01月06日 20時18分31秒 に実施しました。
依存関係が解決しました。
(中略)
インストール 1 パッケージ
ダウンロードサイズの合計: 951 k
インストール済みのサイズ: 3.2 M
これでよろしいですか? [y/N]: y
(中略)
インストール済み:
redis-5.0.7-1.fc31.x86_64
完了しました!
GROWIのインストールとセットアップ
前提となるソフトウェアのインストールが完了したら、GROWIを以下の手順でインストールします。
- 以下のコマンドを実行し、GROWIのソースコードを取得します。この例では/opt/wiki/growiディレクトリの下にソースコードがcloneされます。
$ sudo mkdir /opt/wiki
$ cd /opt/wiki
$ sudo git clone https://github.com/weseek/growi.git - yarnを実行し、GROWIが依存しているNode.jsのパッケージをダウンロードします。すると…
$ cd /opt/wiki/growi
$ sudo yarnyarn install v1.21.1
[1/5] Validating package.json…
[2/5] Resolving packages…
[3/5] Fetching packages…
warning sha.js@2.4.9: Invalid bin entry for “sha.js” (in “sha.js”).
info fsevents@1.2.7: The platform “linux” is incompatible with this module.
info “fsevents@1.2.7” is an optional dependency and failed compatibility check. Excluding it from installation.
info fsevents@1.2.4: The platform “linux” is incompatible with this module.
info “fsevents@1.2.4″ is an optional dependency and failed compatibility check. Excluding it from installation.
[4/5] Linking dependencies…
warning ” > mongoose-gridfs@1.2.2″ has incorrect peer dependency “mongoose@>=5.5.14”.
warning “mongoose-gridfs > @lykmapipo/mongoose-common@0.25.3” has incorrect peer dependency “mongoose@>=5.6.0”.
warning “mongoose-gridfs > @lykmapipo/mongoose-common > mongoose-valid8@1.5.9” has incorrect peer dependency “mongoose@>=5.6.0″.
warning ” > multer-autoreap@1.0.3″ has incorrect peer dependency “express@^4.16.3”.
warning “eslint-config-weseek > eslint-config-airbnb@17.1.0” has incorrect peer dependency “eslint@^4.19.1 || ^5.3.0”.
warning “eslint-config-weseek > eslint-config-airbnb@17.1.0” has unmet peer dependency “eslint-plugin-jsx-a11y@^6.1.1”.
warning “eslint-config-weseek > eslint-config-airbnb > eslint-config-airbnb-base@13.1.0” has incorrect peer dependency “eslint@^4.19.1 || ^5.3.0”.
warning “eslint-plugin-jest > @typescript-eslint/experimental-utils > @typescript-eslint/typescript-estree > tsutils@3.17.1” has unmet peer dependency “typescript@>=2.8.0 || >= 3.2.0-dev || >= 3.3.0-dev || >= 3.4.0-dev || >= 3.5.0-dev || >= 3.6.0-dev || >= 3.6.0-beta || >= 3.7.0-dev || >= 3.7.0-beta”.
warning ” > metismenu@3.0.3″ has unmet peer dependency “jquery@^3.3.1″.
warning ” > react-frame-component@4.0.0″ has unmet peer dependency “prop-types@^15.5.9″.
warning ” > stylelint-config-recess-order@2.0.1″ has incorrect peer dependency “stylelint@^9.9.0”.
warning “stylelint-config-recess-order > stylelint-order@2.1.0” has incorrect peer dependency “stylelint@^9.10.1”.
warning “swagger2openapi > better-ajv-errors@0.6.6” has unmet peer dependency “ajv@4.11.8 – 6”.
warning “unstated > create-react-context@0.1.6” has unmet peer dependency “prop-types@^15.0.0”.
[5/5] Building fresh packages…
Done in 289.25s.
のように実行されて、パッケージがダウンロードされます。warningがたくさん出ますが、errorではないので先に進めることにします。 - /opt/wiki/growi/config/env.prod.jsを以下のように変更する(デフォルト値のままで起動したところ、”javascript heap out of memory”と表示されて起動に失敗したため)。なお、Version 4.0.10ではMathJaxを使用するための設定はenv.prod.jsに設定しないと有効にならなかったので、5行目に追加しています。
- GROWI用の設定ファイルを作成し、/etc/sysconfig/growiの下に置きます。なお、最後の行の設定はMathJaxを使用するための設定です。
- GROWIを起動するためのサービスのユニット定義ファイルを作成し、/etc/systemd/system/growi.serviceの下に置きます。
- 手順5のユニット定義ファイルでは/opt/wiki/startgrowi.shを起動時に使用しているので、/opt/wiki/startgrowi.shファイルを作成し、以下のように記述します。
- サービスのユニット定義ファイルを追加したので、以下のコマンドを実行し、変更を反映しておきます。
$ sudo systemctl daemon-reload
試運転
以下のコマンドを実行し、起動できることを確認してみます。
$ sudo systemctl start growi
正常に起動できたことを確認できたら、適当なブラウザを起動し、http://localhost:3000/にアクセスしてみます。
すると…

のような感じでインストーラが起動できれば、GROWIのインストール及び設定は完了です。
なお、スマホからアクセスするとこんな感じの表示になります↓
まとめと今後の課題
GROWIが前提としているソフトウェアの数が多めではありますが、どのソフトウェアもdnfでパッケージの管理ができるので、そのあたりは気にしないことにします。
器を変えたので記事の棚卸しも捗りそうですが、GROWIで記事を蓄積するには、まずGROWI自体の設定が必要です。
ということで、GROWIを使い始めるための設定などについては次の記事で書きます。
この記事は以上です。
(補足)「”manifest.json”がない」というエラーが発生した場合の対応
Growiの起動時に「publicディレクトリの下に”manifest.json”がない」というエラーが発生して起動ができなかった場合には、root権限で以下のコマンドをすかさず実行します。
少々時間がかかることはあるもののbuildが実行され、publicディレクトリの下にmanifest.jsonが生成されます。
References / 参考文献
- Growi構築メモ
- 個人用のWikiをGrowiを用いて構築
- GROWI – Team collaboration software using markdown
- CentOS7.5にGrowiをインストール
 MediaWikiサーバを移転してみる。
  移転先のMediaWikiサーバの構成及び設定を移転元のMediaWikiサーバの設定と合わせる。
  最近修正できてよかったと思うWebサイトの細かい不具合n選
 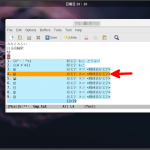 Emoji🐼 on Emacs and Fedora 29 & 30: 絵文字を使いたいと思ったらいろいろと設定しまくることになったので、メモしてみた。